CH340 Driver Installation
Installation and Usage
To get started with the NearLink ToolBox, you need to prepare the following:
- A computer with 64-bit Windows 10 or higher
- A pair of NearLink development boards, such as BearPi-Pico H3863
- Installation of the CH340 Qinheng driver, for which we will provide the official link in the tutorial below
- Two Type-C data cables, ready to connect the NearLink development board to your computer
- Install Hispark Studio
- Install Git
- Compile & Flash & Test
- Configure accelerated compilation (to be updated by Haixingtong community)
- Install VSCode Deveco Device Tool plugin (optional, to be updated)
- Download and retain the DevTools_CFBB compilation toolchain (optional, to be updated)
- Download the Haohanyh NearLink ToolBox plugin (to be updated)
- Download the Haohanyh NearLink ToolBox development materials (to be updated)
Start Downloading and Installing
Download and install the following software:
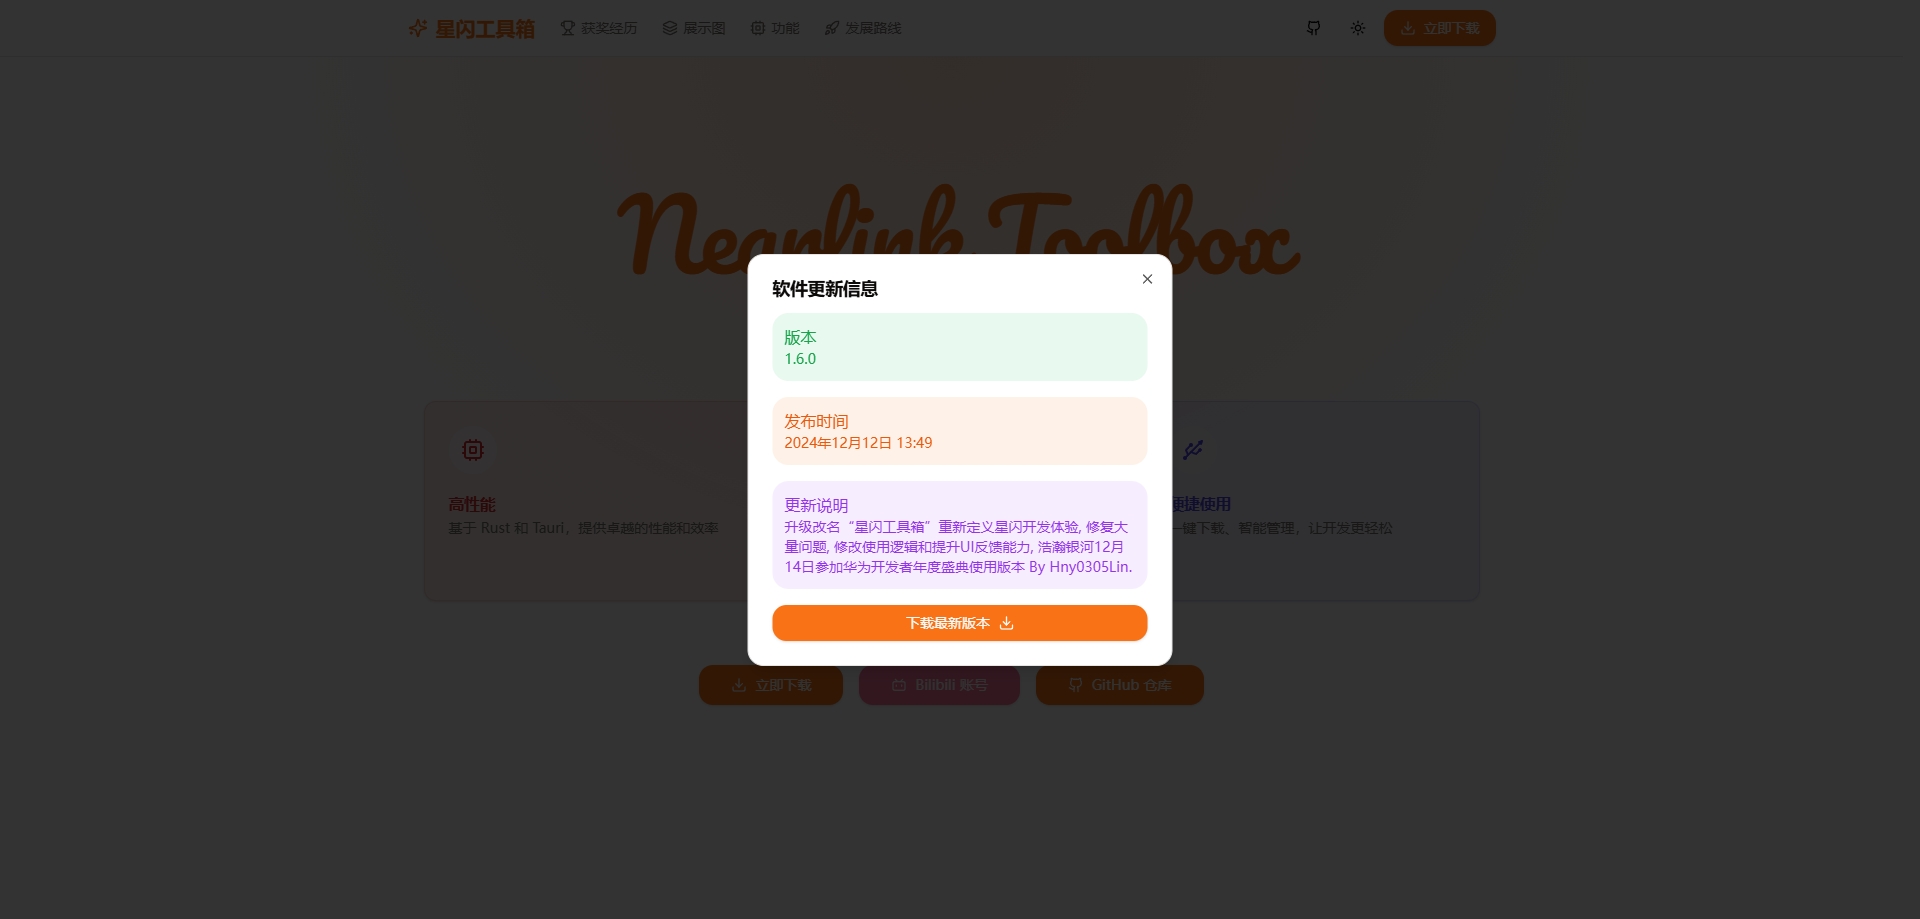
NearLink ToolBox Installation
Download to a directory location you are familiar with, such as “downloads” or “download folder,” stored on a non-Windows system drive.
CH340 Driver Installation
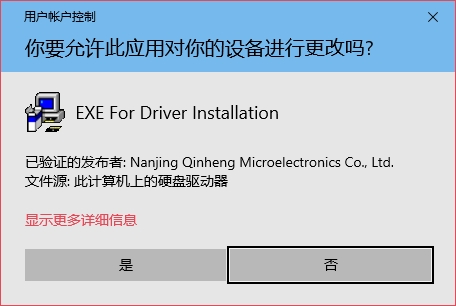
Download the CH341SER.EXE file from the Qinheng official website, save it, and open it. If a UAC pop-up appears, click “Yes” to allow the operation.
Then we can open the page.
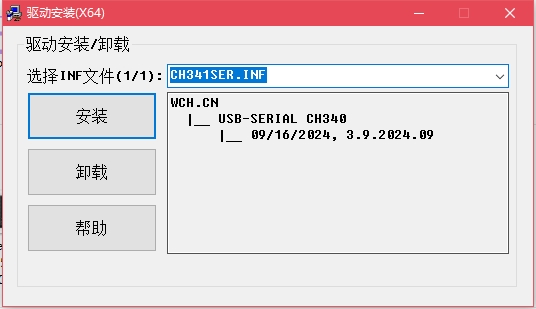
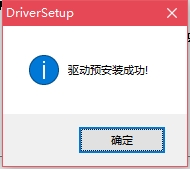
When you encounter the following page, click the “Install” button. The program will run automatically until a pop-up says “Pre-installation successful,” indicating that the CH340 driver installation is complete.
If the installation fails, please close all antivirus software before opening the CH341SER.EXE file, right-click and select “Run as administrator.”
NearLink ToolBox Installation
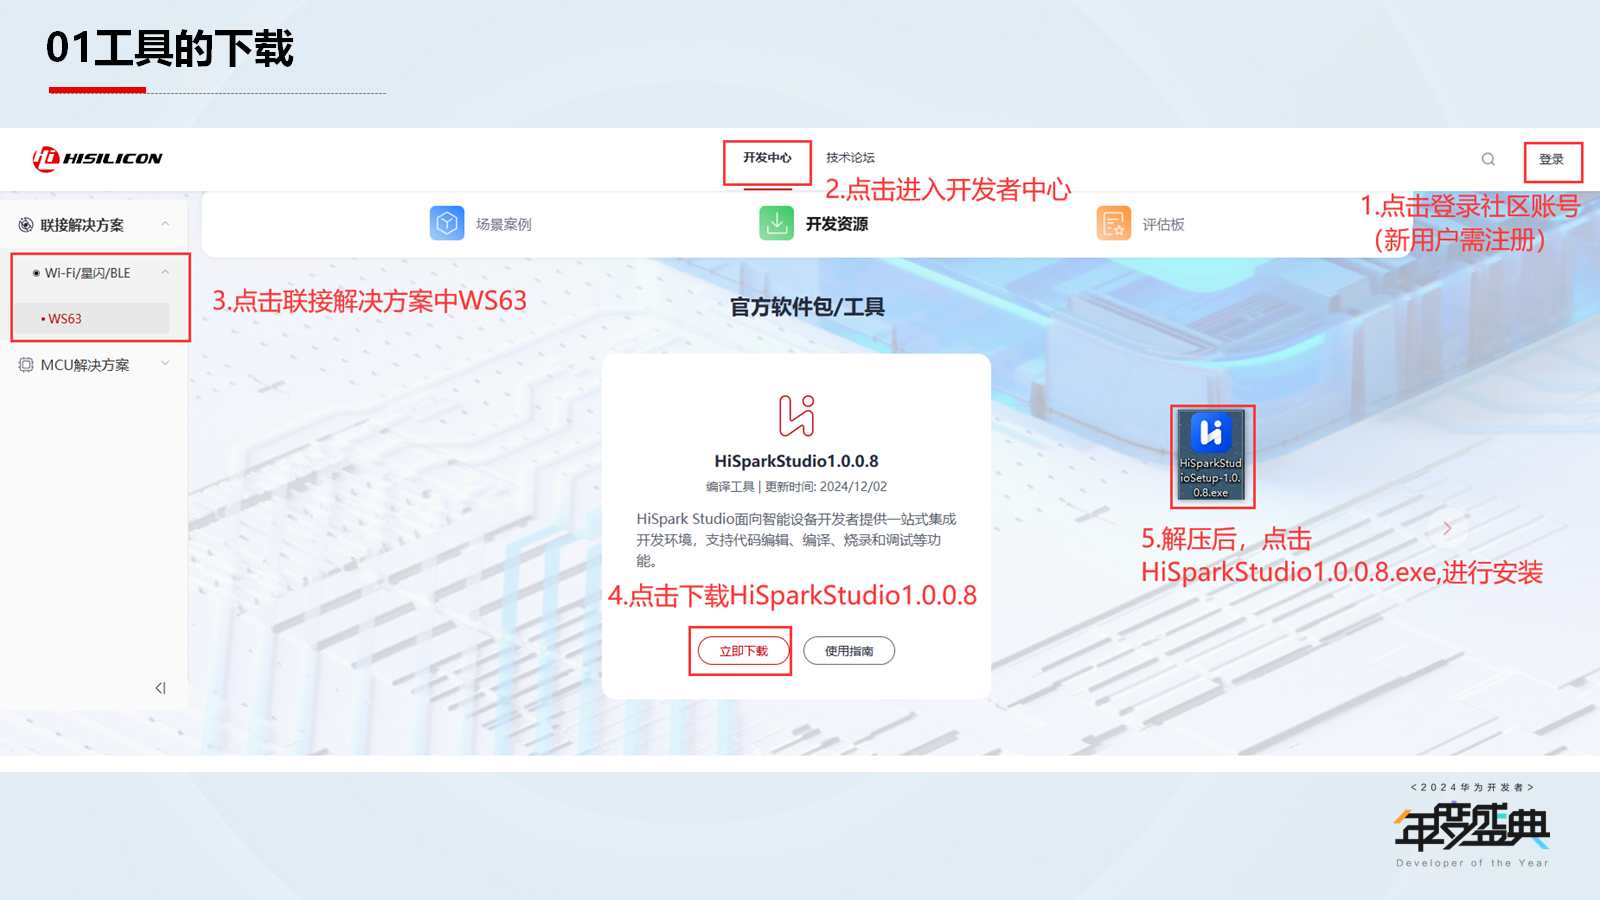
To install the NearLink ToolBox, please visit the official website NearLink ToolBox to download the installation package.
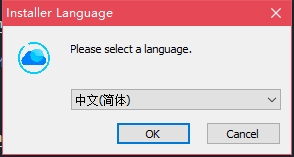
Please select Chinese (Simplified) and click OK to start the installation.
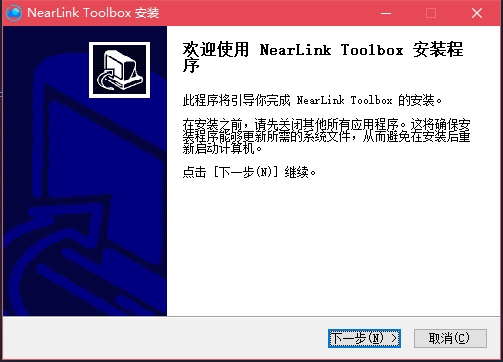
Click Next to continue the installation.
Modify the installation directory to a non-Windows system drive folder, then click Next to continue.

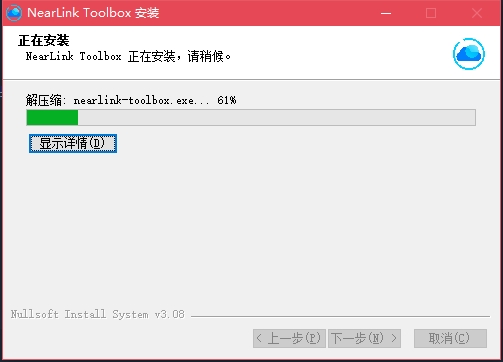
Click Next to complete the final installation.
Check “Run NearLink ToolBox” and “Create desktop shortcut,” then click Finish.

The software will automatically start. If it opens normally, congratulations, you have completed the installation and setup.

Developer Configuration
Install Hispark Studio
Download and Install
HiSpark Studio provides an integrated development environment for smart device developers, supporting code editing, compilation, flashing, and debugging.
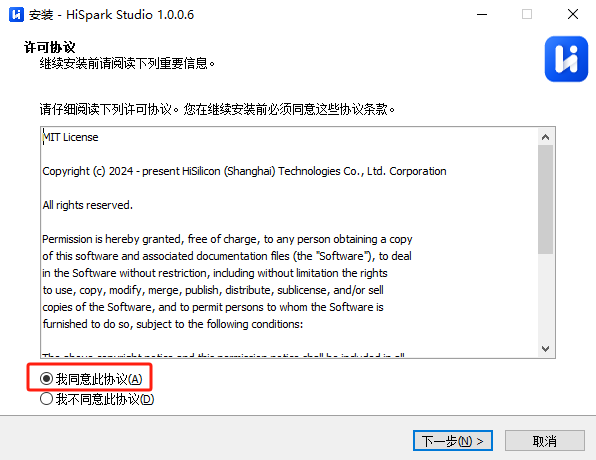
After downloading, double-click “HiSparkStudio1.0.0.8.exe” to install. The installation interface is as follows; select “I agree to this agreement” and click “Next.”
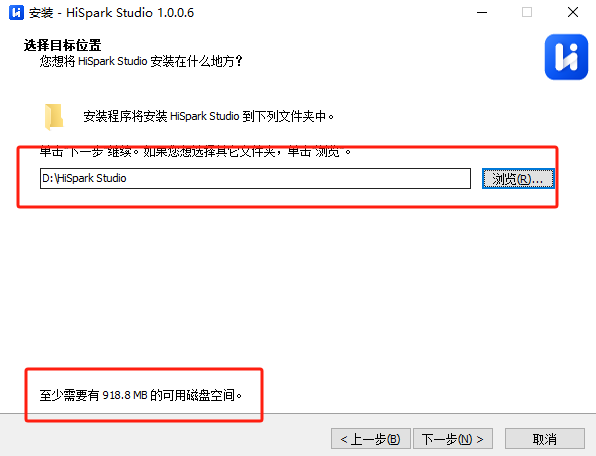
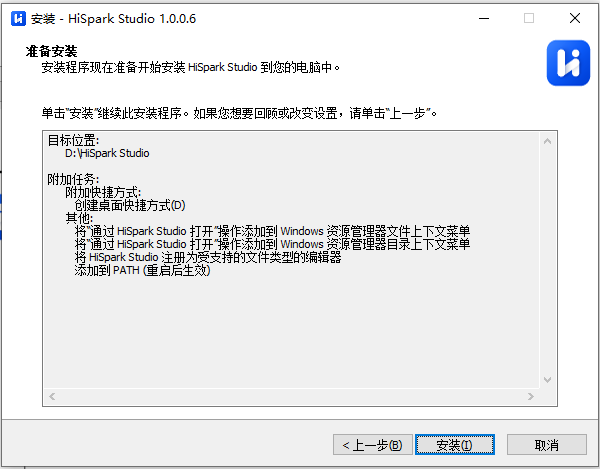
Based on your disk space, select the corresponding disk for installation, then click Next.
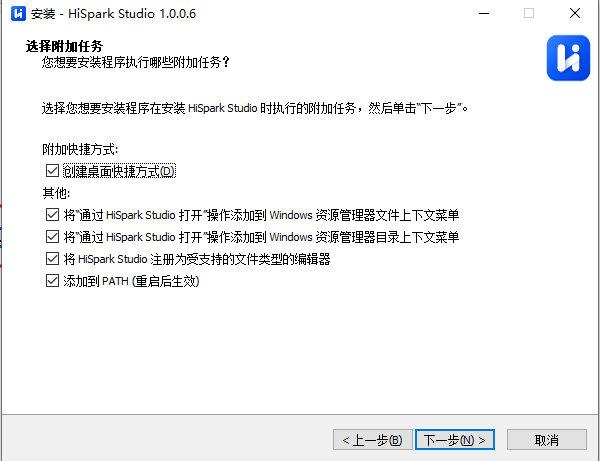
Check additional tasks as needed; all are checked by default. After selection, click Next.
Click “Install” to begin the tool installation.
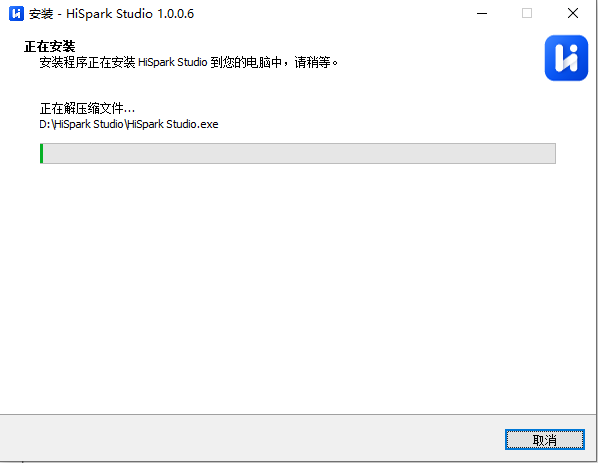
The installation process is as follows; wait for it to complete.
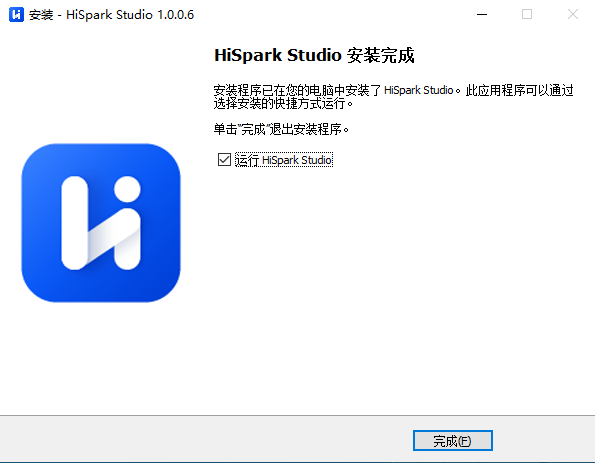
The following interface indicates that the installation is complete; click Finish.
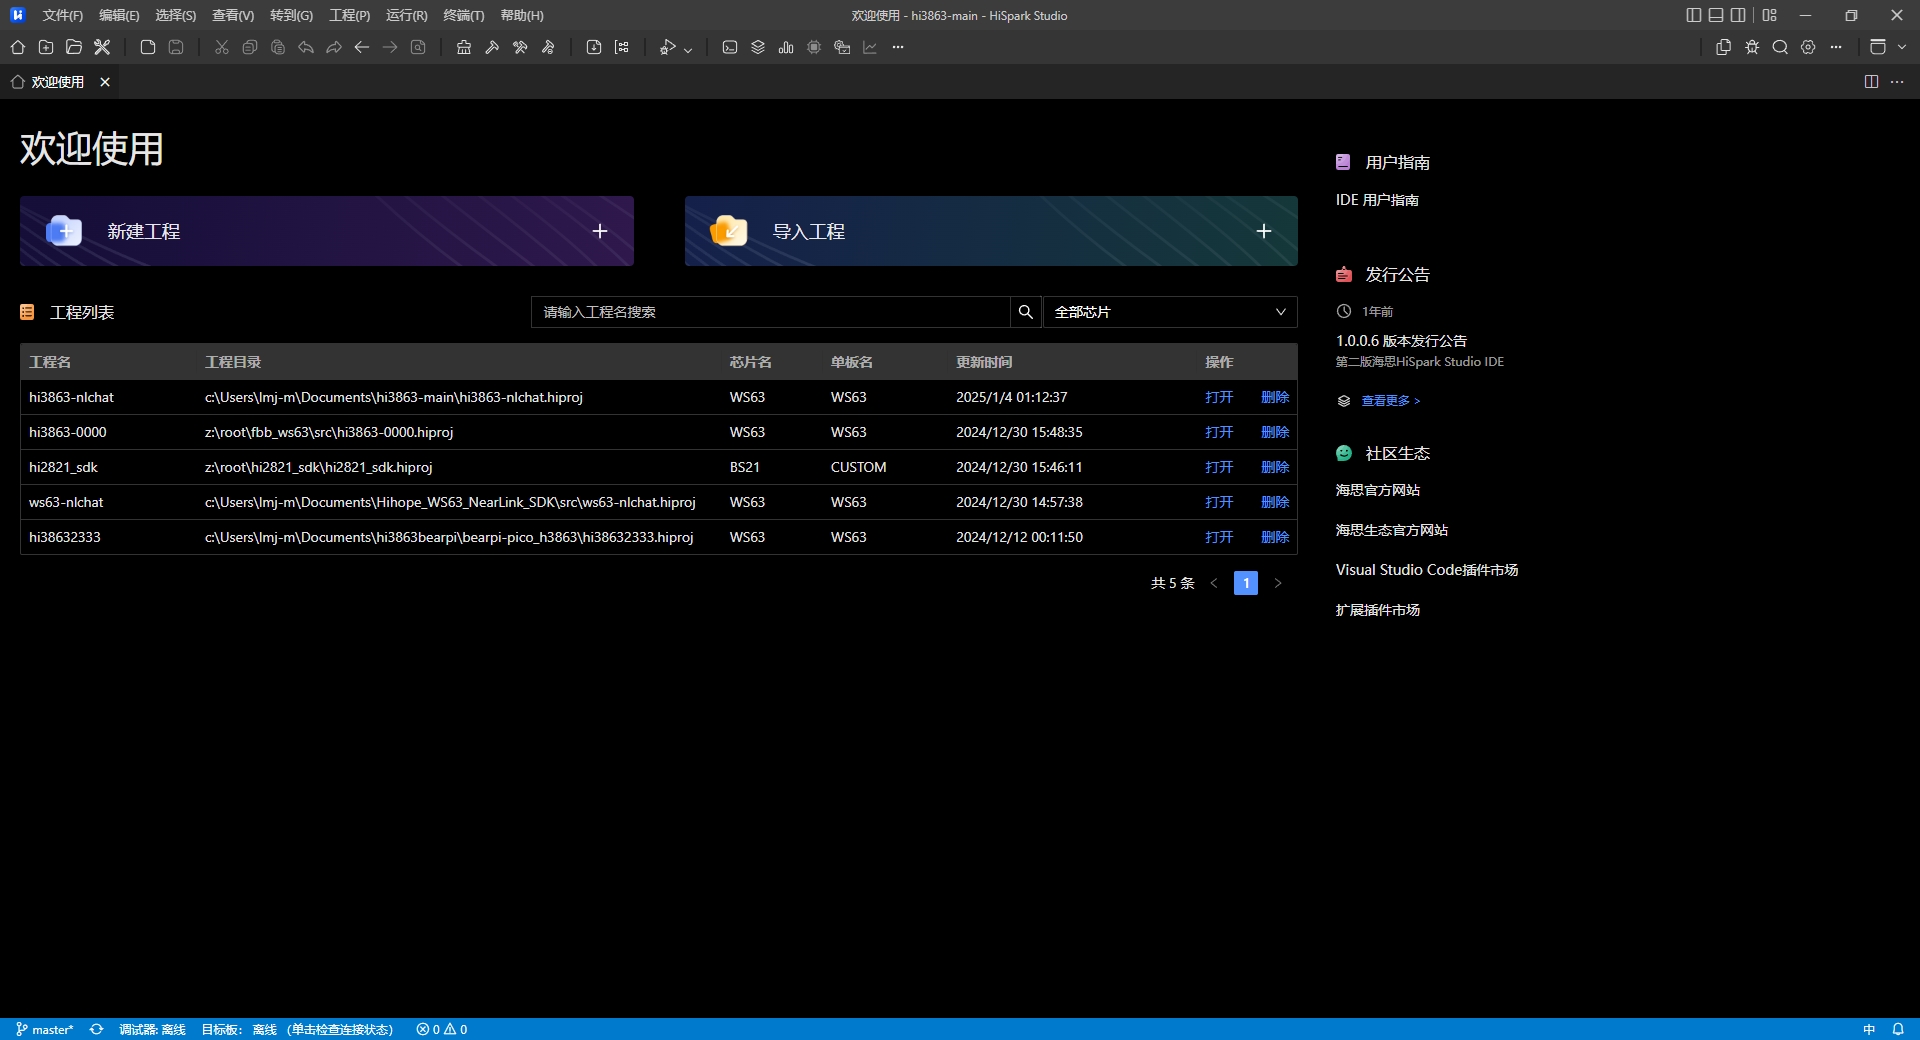
The HiSpark Studio homepage interface is as follows.
Install Git
You can download the exe installation file from Git’s website and run it:
After downloading, double-click the installation package. The interface is as follows; click “Next” to start the installation.
After completing the installation, you can use the command-line git tool (which already includes an SSH client) and a graphical Git project management tool.
In the Start menu, find “Git” -> “Git Bash,” which will open a Git command window where you can perform Git operations.
SDK Code Download & Compile
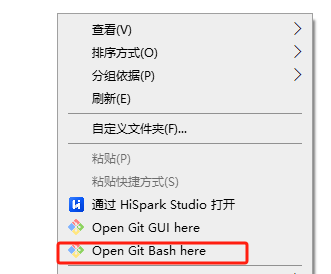
Download via Git command. On your storage drive, right-click and select “Open Git Bash here,” as shown.
In the command box, enter git clone https://gitee.com/HiSpark/fbb_ws63.git to download the code, and wait for the download to complete.

After the download is complete, the folder will appear as shown.

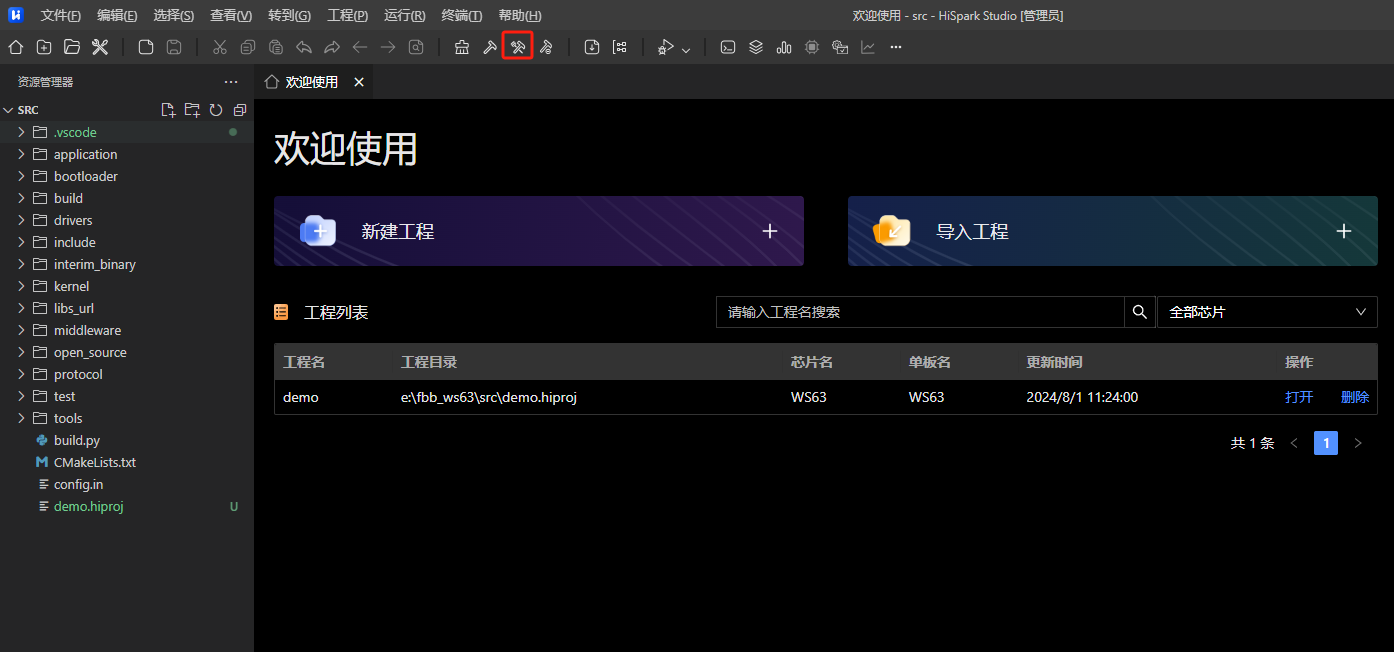
After downloading the code, open the HiSpark Studio tool and click “New Project.”

In the new project interface, select chip: ws63, project name: “xxx” (user-defined, but no Chinese or special characters), software package: xxx/fbb_ws63/src (SDK software package storage path, must be selected to the src level, otherwise the creation will fail). After configuration, click “Finish.”

Click “build” or “rebuild” to compile, and wait for the compilation to complete.
The compilation completion is shown below.

Flash
After installing the driver, connect your NearLink development board to your computer and open the NearLink ToolBox. The NearLink ToolBox has three methods for flashing firmware, as follows:
One-Click Flash
- Go to the “Browse Firmware” page, select the firmware you need to use or the firmware already distributed to you. After clicking the page, you can see a brief description and file name of each firmware in the “Include Files.” Click “One-Click Flash” to start flashing.

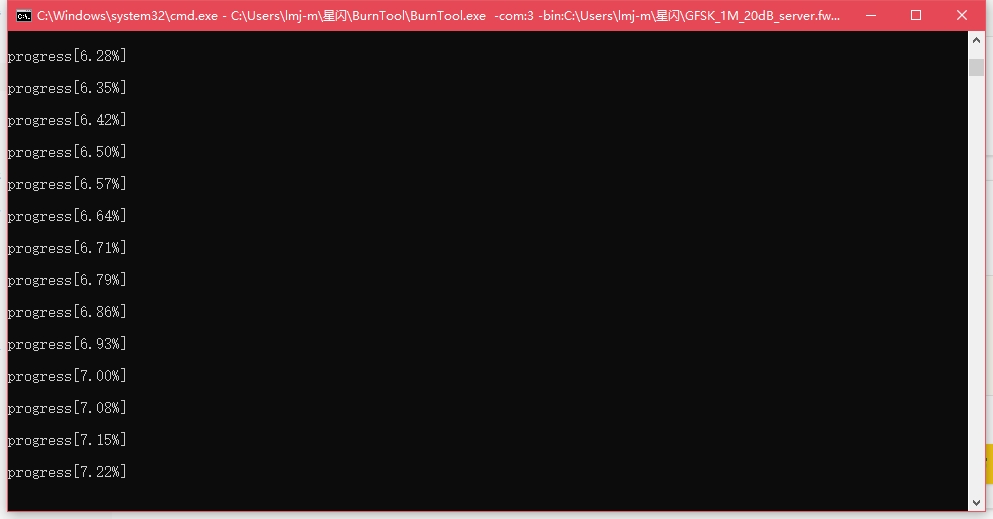
During the firmware flashing, please check the pop-ups in the software. After confirming, the progress bar in the new command-line window will complete the flashing.
Manual Flash
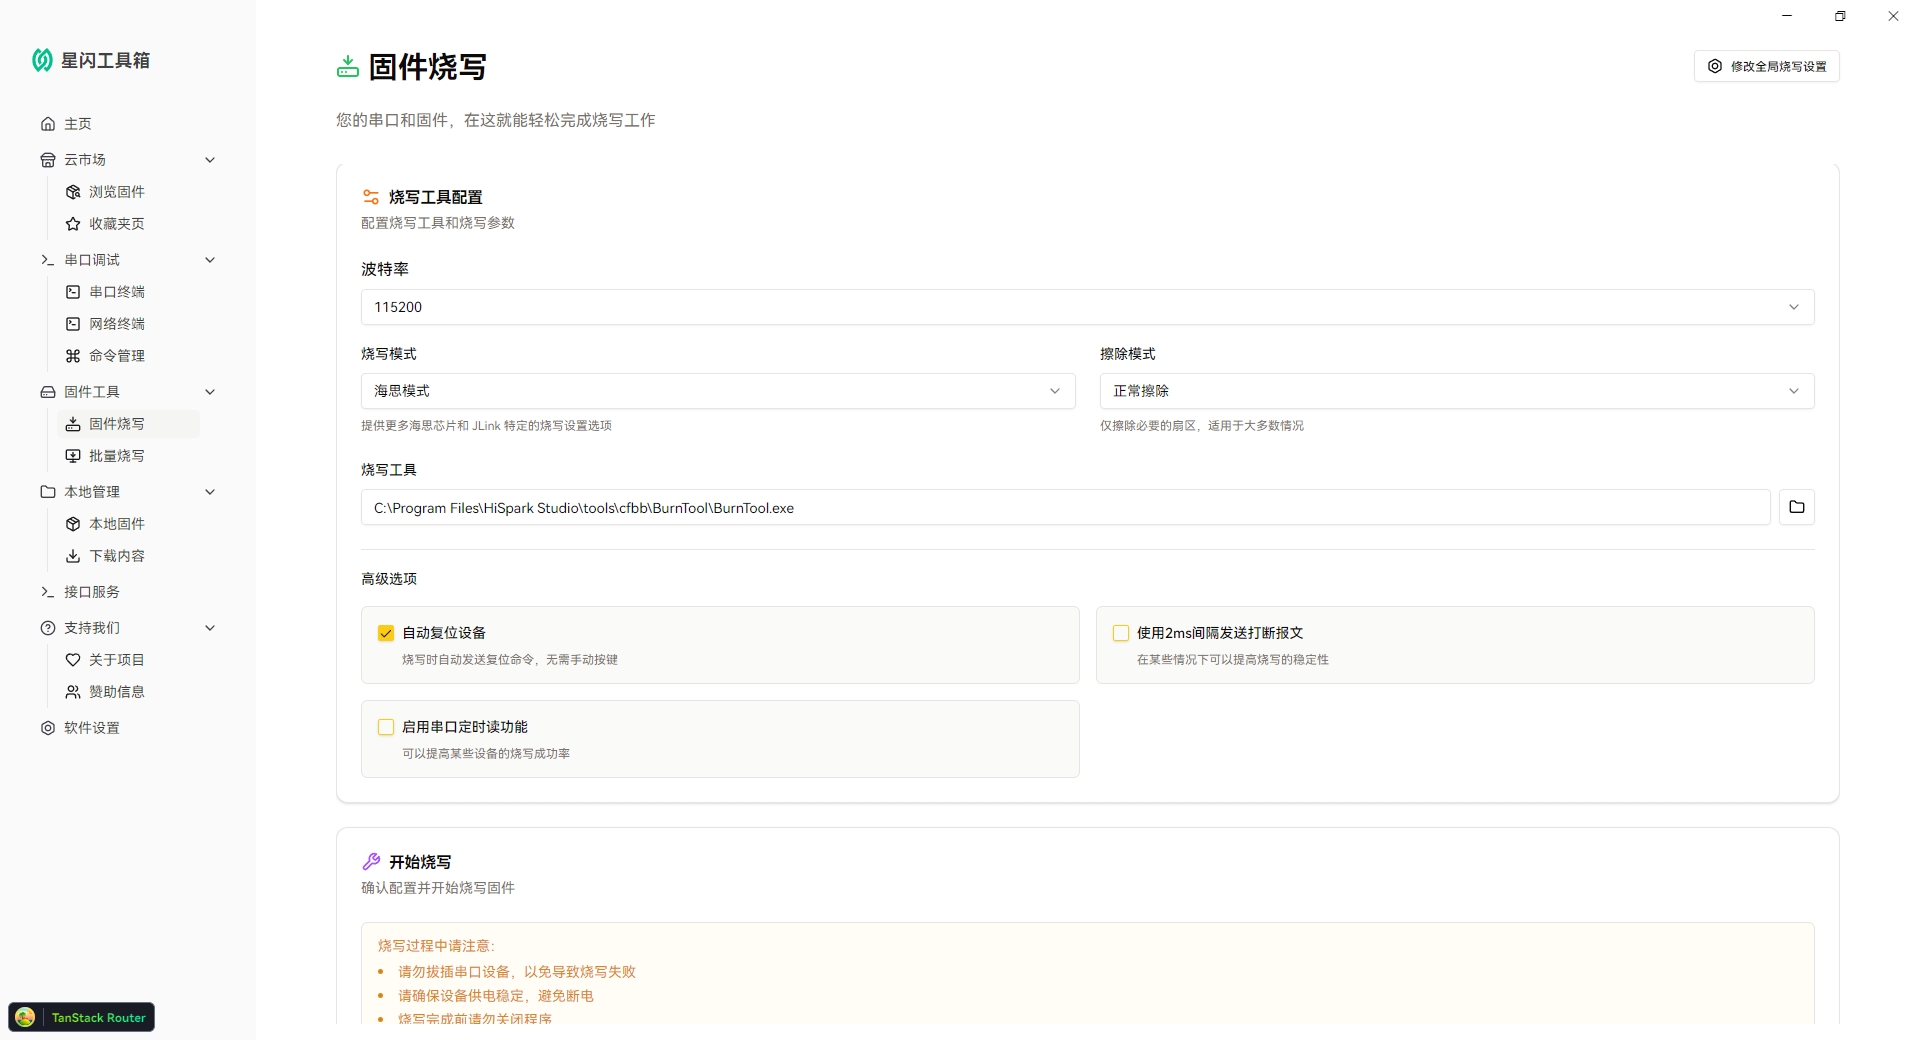
- Go to the “Firmware Flash” page, select the serial port device you need to flash in the “Serial Port Device” drop-down box, then select the firmware file to flash in the “Firmware Selection” drop-down box. Check your flashing tool configuration to ensure it is correct. It is recommended to select HiSilicon mode and check if the flashing tool path is correct!
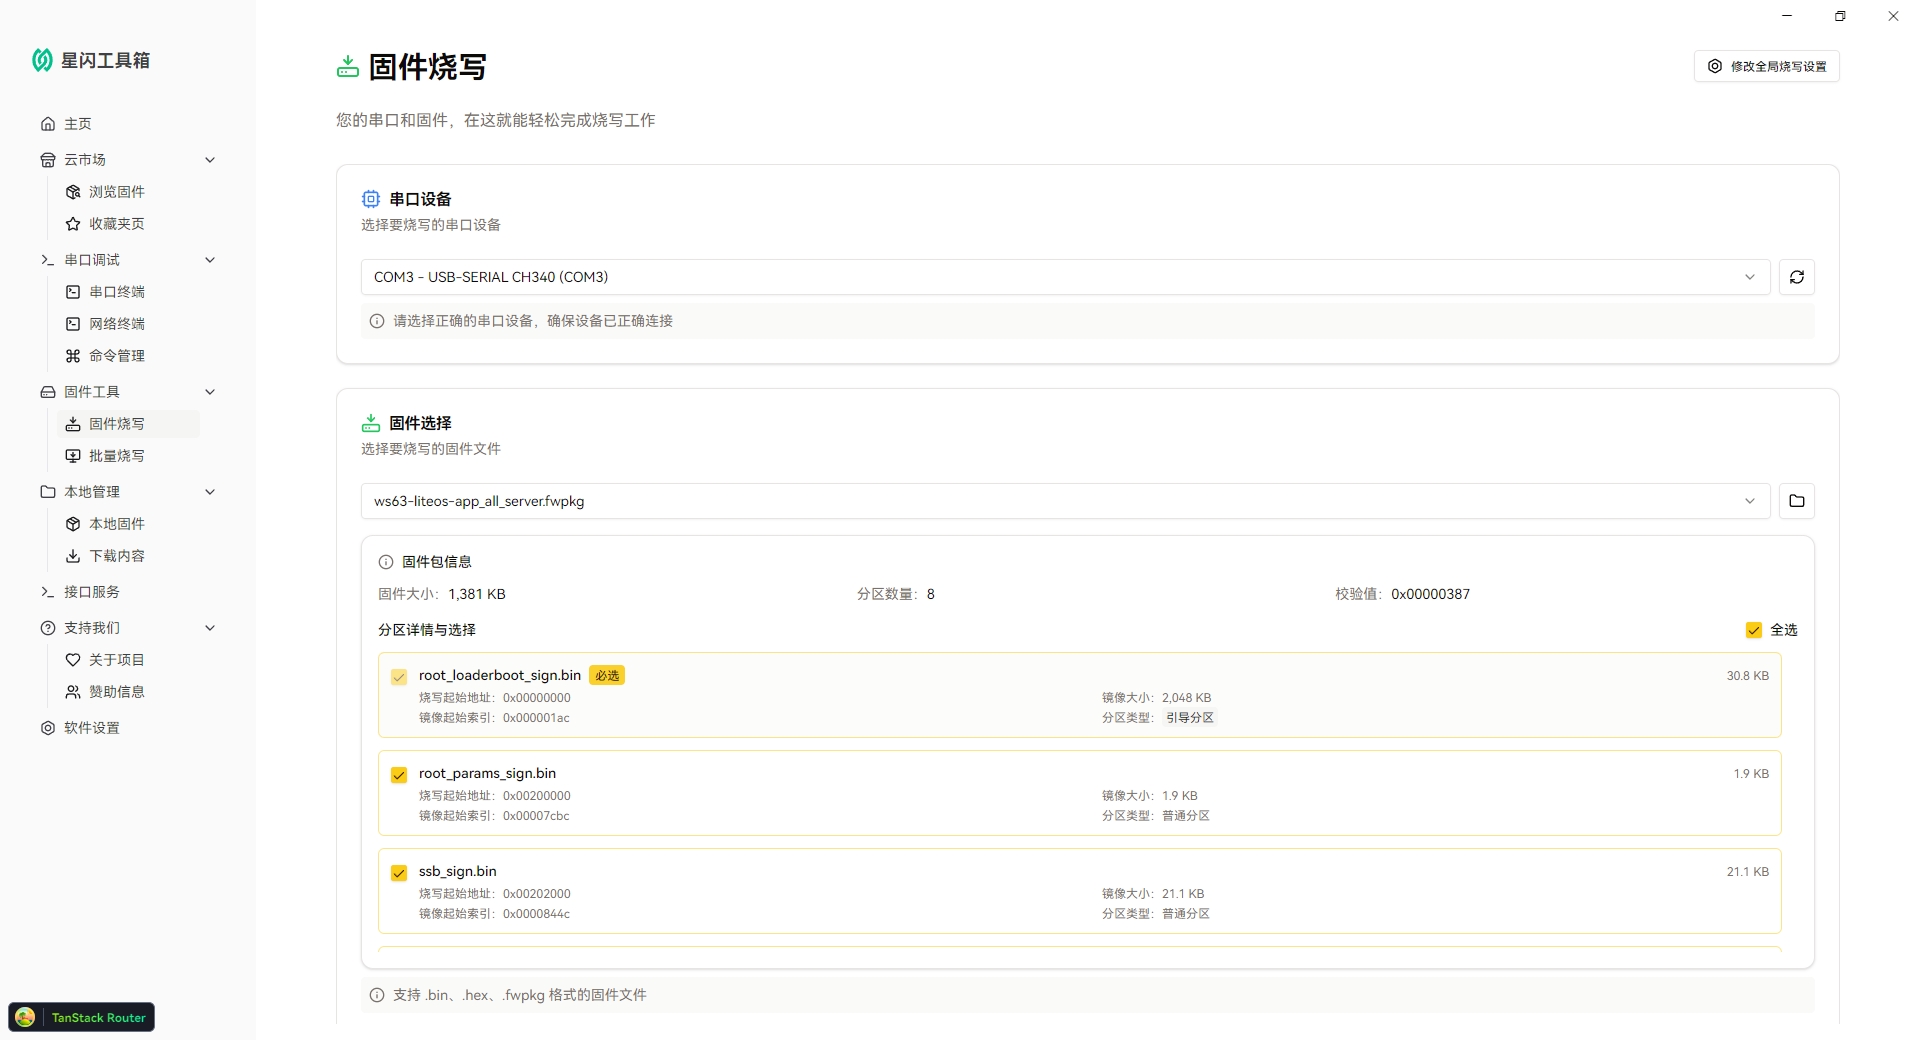
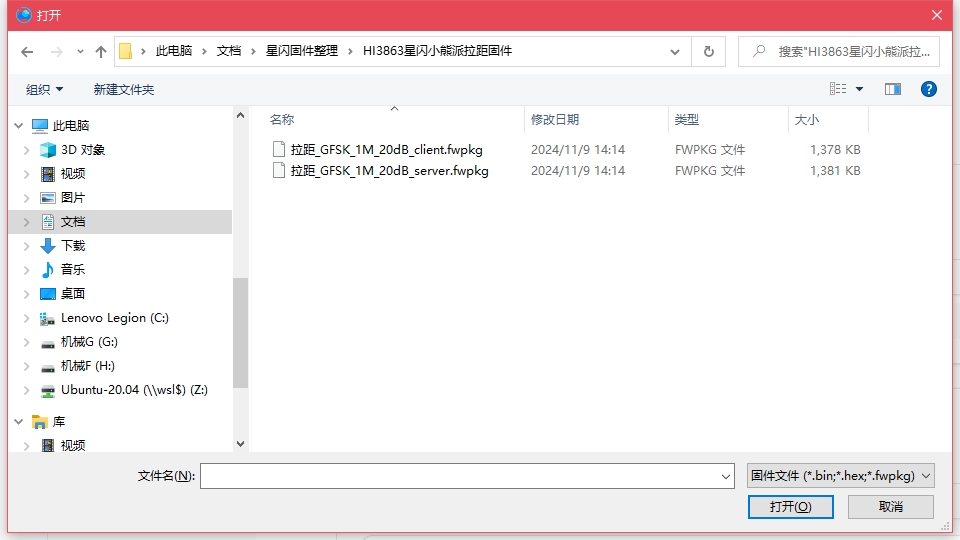
You can also find a folder button on the right side of the “Firmware Selection” drop-down box. After clicking, select the .fwpkg format firmware file you need to flash, click “Open,” and complete the firmware selection.
During the firmware flashing, please check the pop-ups in the software. After confirming, the progress bar in the new command-line window will complete the flashing.
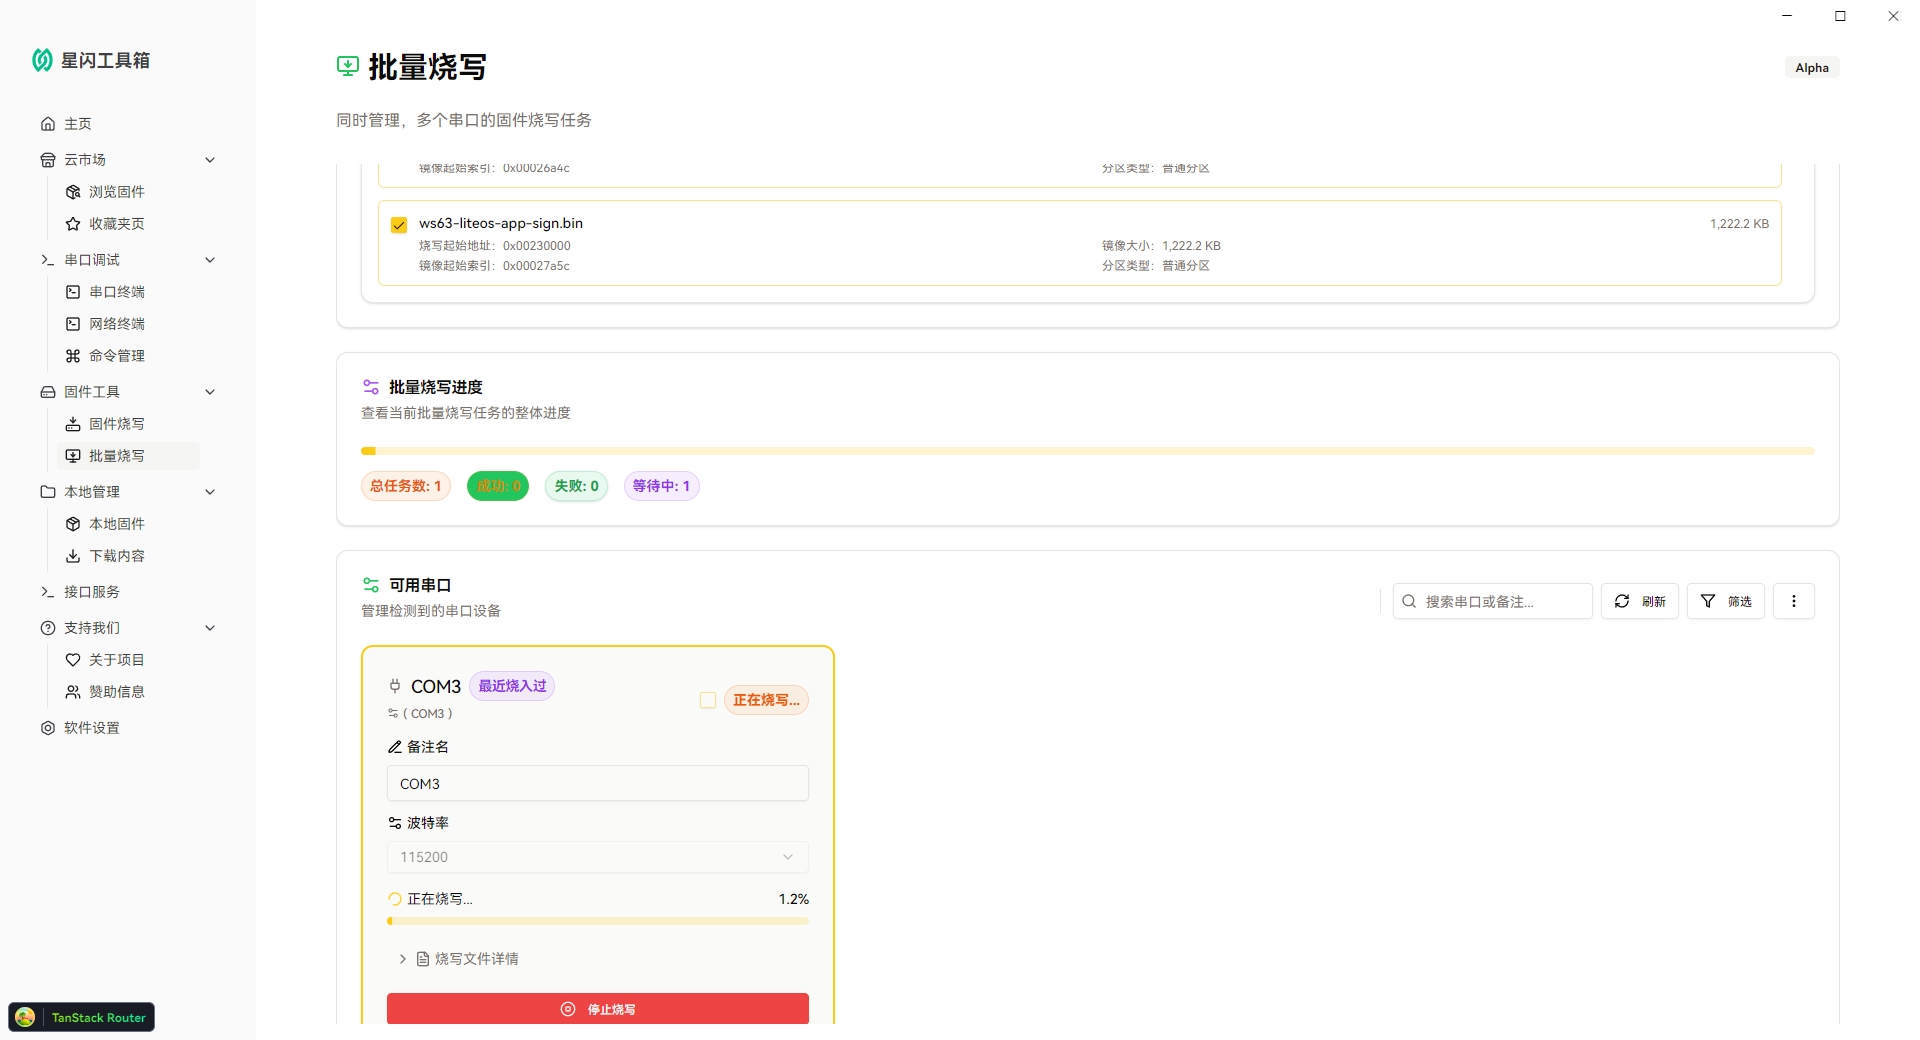
Batch Flash
- Go to the “Batch Flash” page, select the firmware file to flash in the “Firmware Selection” drop-down box. Check your flashing tool configuration to ensure it is correct. It is recommended to select HiSilicon mode and check if the flashing tool path is correct!
Then check the serial port devices you need to flash in the “Available Serial Ports,” set the baud rate, and click “Start Flash” or the “Batch Flash” button in the upper right corner.
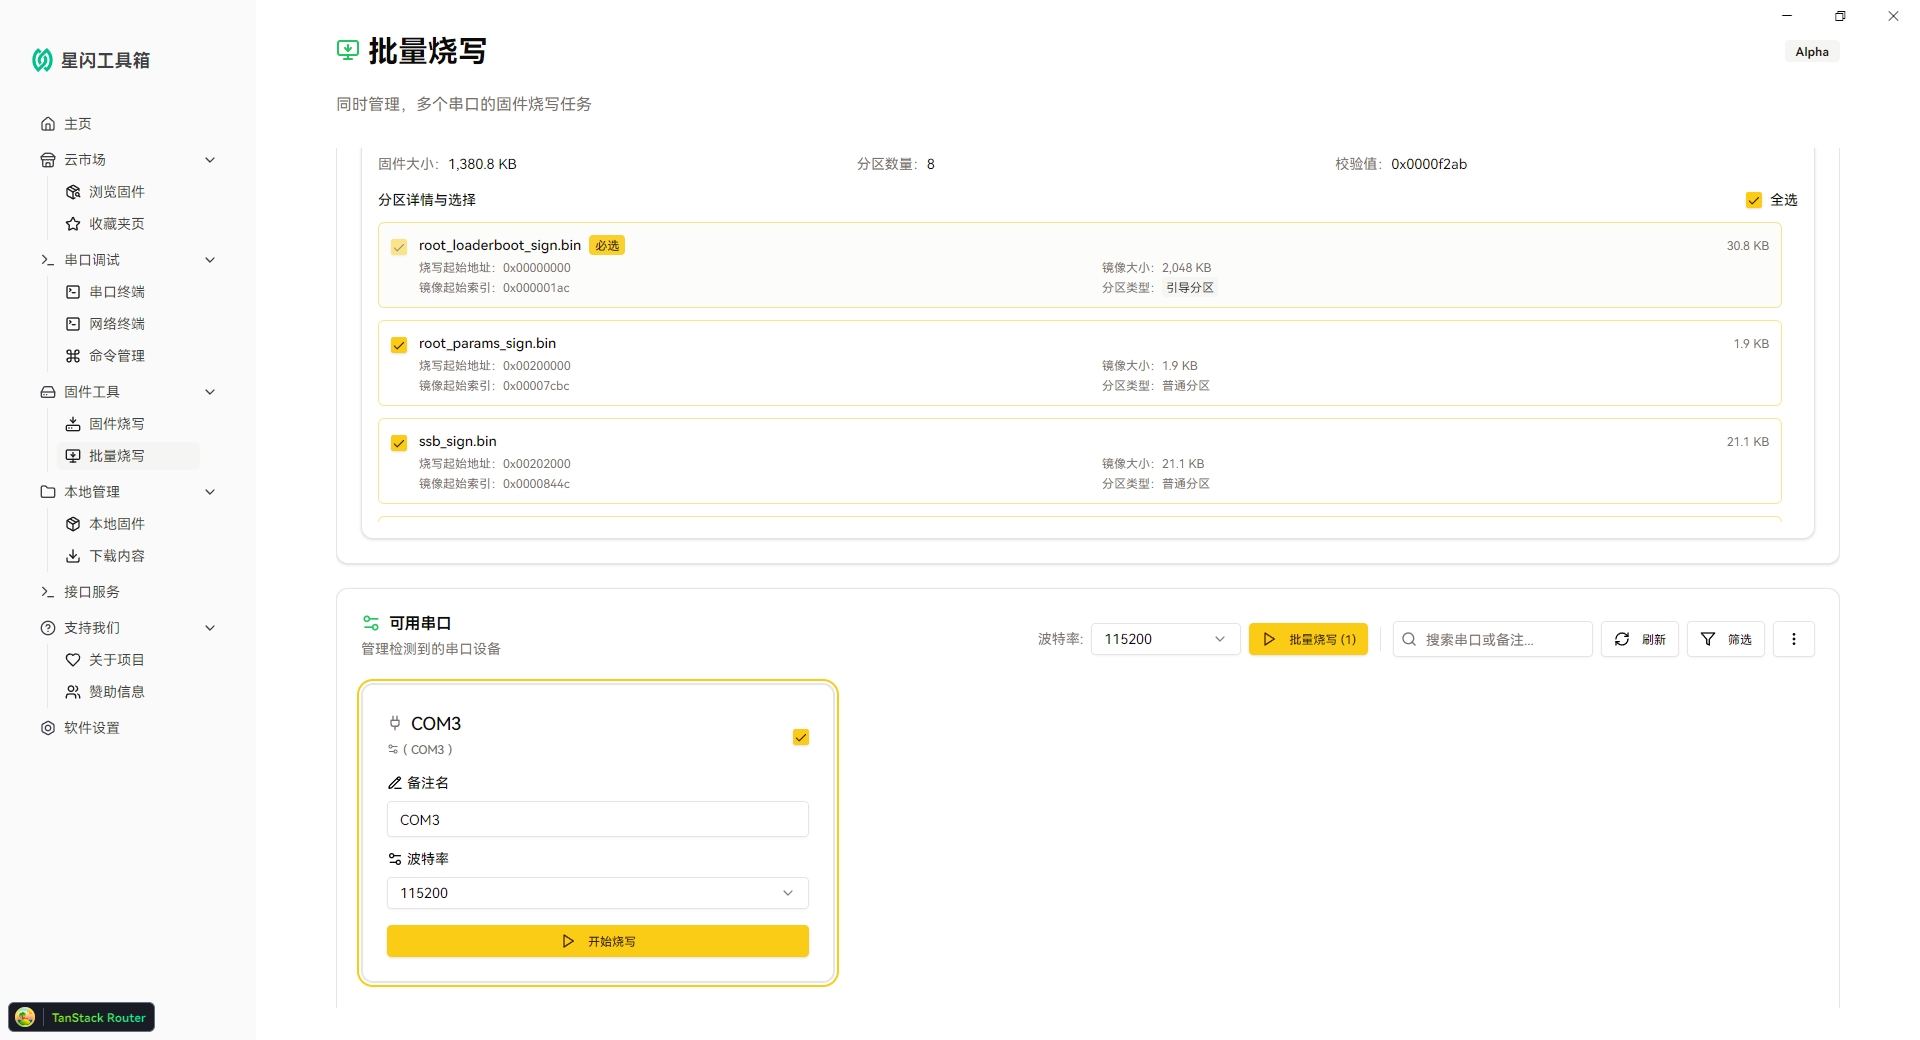
Wait for the progress bar to complete the flashing.
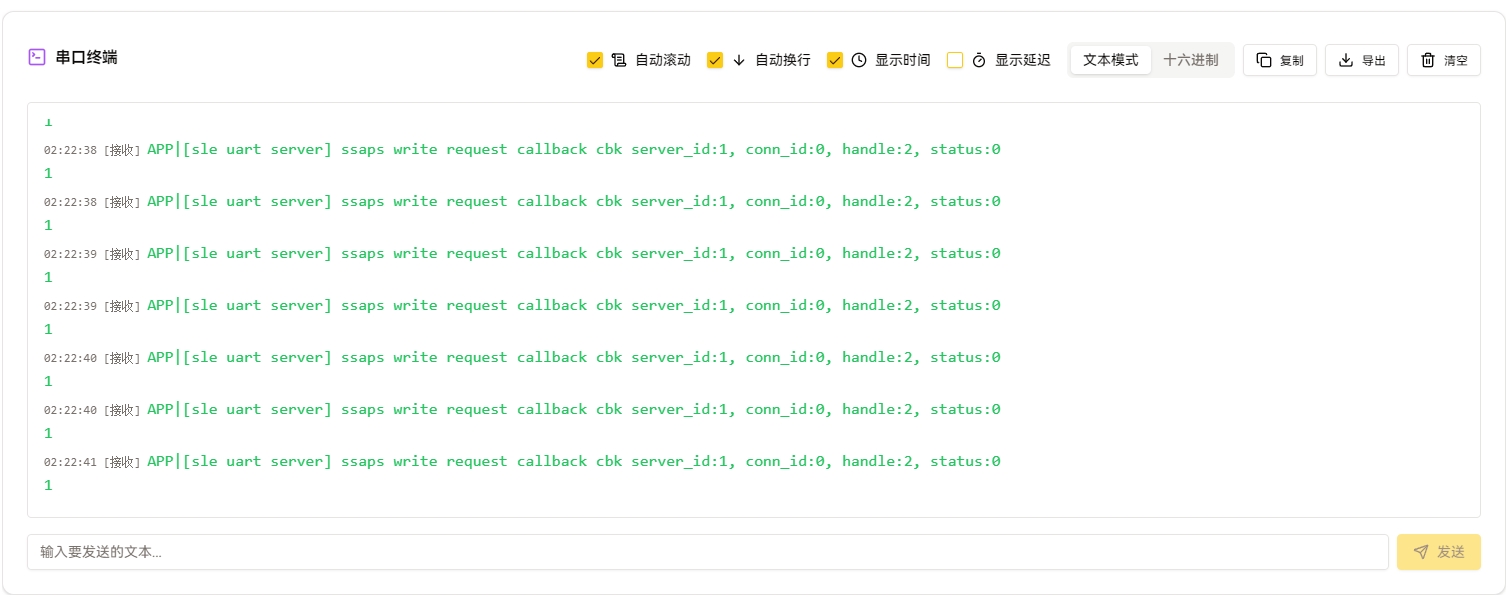
Test
After your serial port is automatically or manually powered on, open the “Serial Port Terminal” page and carefully configure your serial port settings. Generally, the configuration is as follows:
Serial Port Terminal Configuration
- Serial Port: COMX - USB-SERIAL CH34X (COMX)
- Data Bits: 8
- Parity: None
- Stop Bits: 1
- Flow Control: None
- Packet Delay: 50 (recommended)
- Baud Rate: 115200 (recommended)
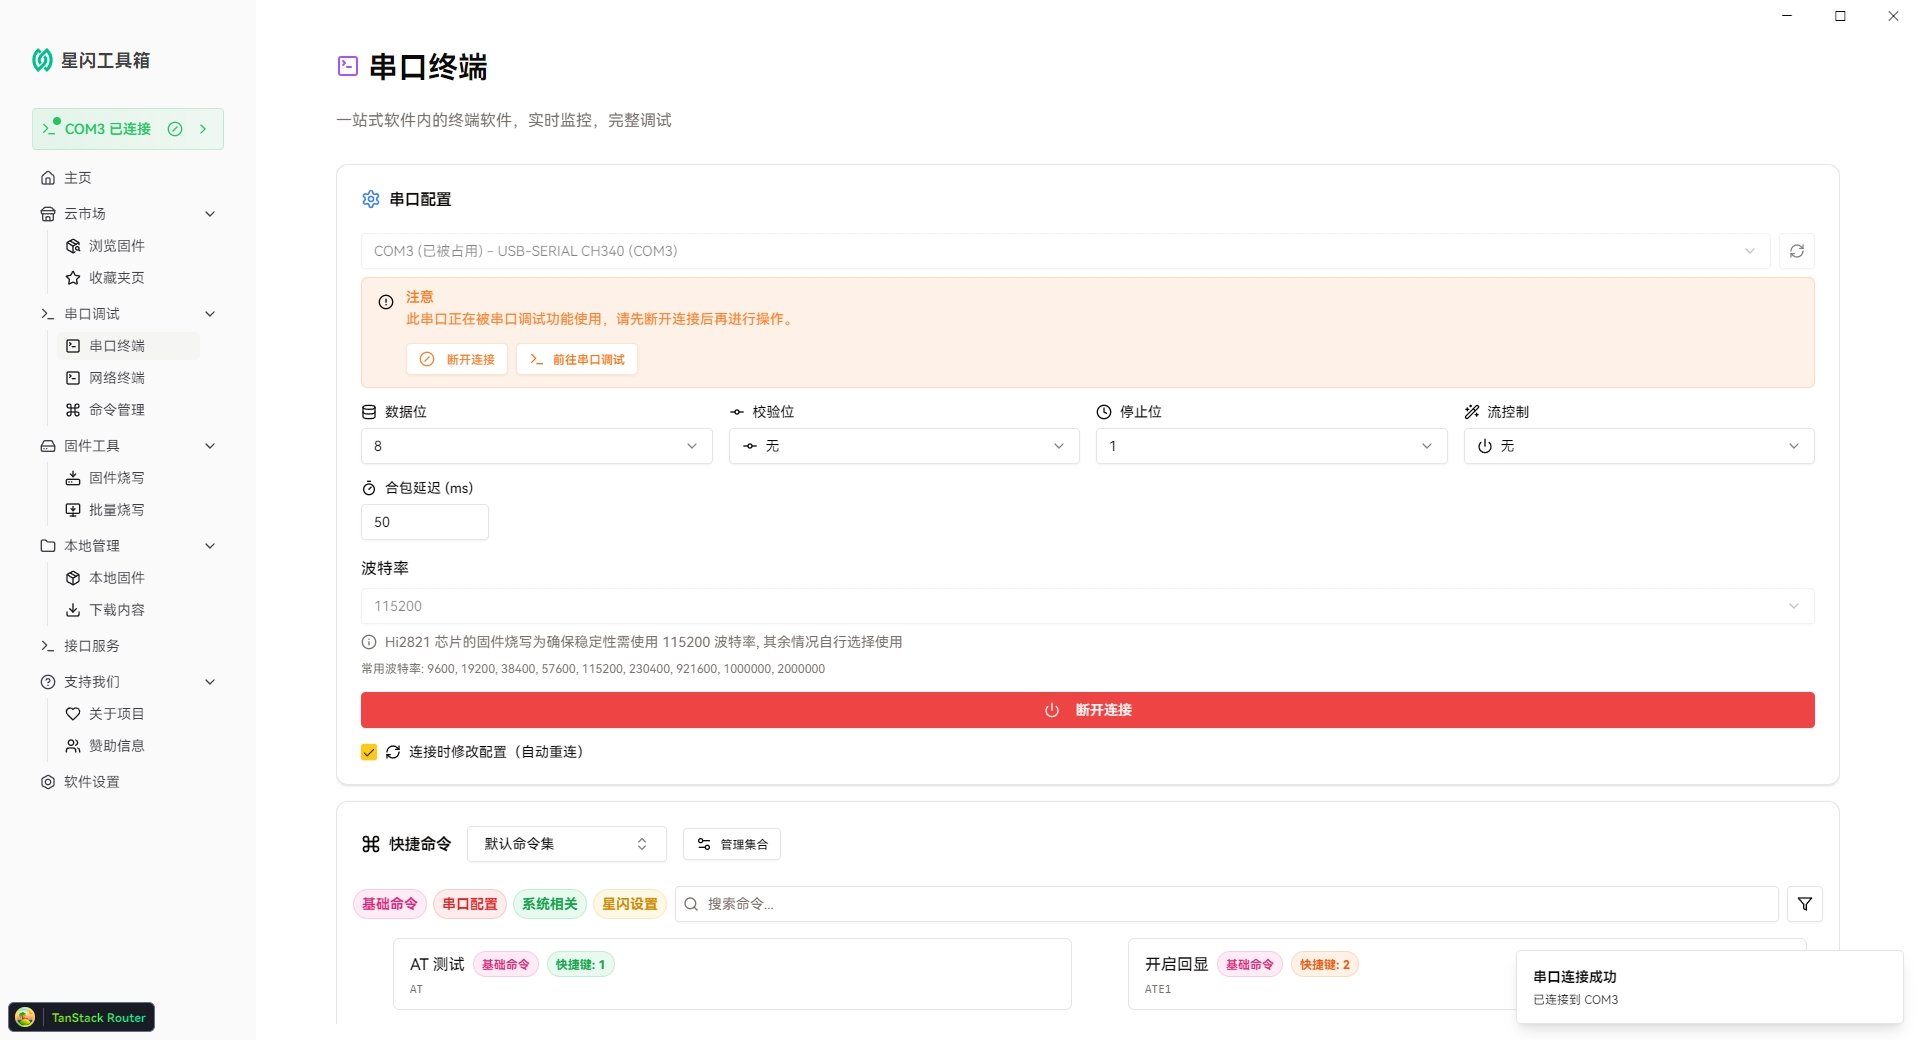
With the above configuration set correctly, you can see the normal serial port terminal content.